Cloudflare Worker
Deploy MuseMVP to Cloudflare Workers with OpenNext and Hyperdrive.
This guide walks you through deploying the repository directly to Cloudflare Workers without changing your local Node.js development workflow.
Prerequisites
- A Cloudflare account with Workers enabled.
- Cloudflare Worker requires a paid plan at $5/month (Workers Paid). The free plan limits bundle size to 3MB (Limits · Cloudflare Workers docs), while the MuseMVP build output is typically 3MB–4MB, which exceeds the free plan limit.
You can deploy the application directly from your local terminal using Wrangler CLI. Follow the steps below to complete the setup and deployment:
Setup
Install Wrangler CLI
Install Wrangler CLI globally in your local development environment:
pnpm install -g wranglerLog in to Cloudflare
Run the following command in your terminal to authenticate with your Cloudflare account:
wrangler loginSet the Wrangler Project Name
In your wrangler.jsonc file, set the name field to your desired Worker name (e.g. musemvp-demo):
"name": "musemvp-demo"Worker name
Worker names are globally unique on Cloudflare — no two Workers can share the same name.
Configure DATABASE_CONNECTION_STRATEGY
DATABASE_CONNECTION_STRATEGY="hyperdrive_first"Runtime strategy
Setting DATABASE_CONNECTION_STRATEGY="hyperdrive_first" ensures that at edge runtime, the OpenNext app uses the Hyperdrive internal binding instead of an inefficient external connection.
Get your PostgreSQL Connection String
Retrieve your database connection string from Neon (or another PostgreSQL provider). It should look similar to:
postgresql://neondb_username:npg_password@ep-xxx-bush-xxxx-pooler.ap-xxx-1.xxx.neon.tech/demo-musemvp-com?sslmode=require&channel_binding=requireConfigure Hyperdrive Database Binding
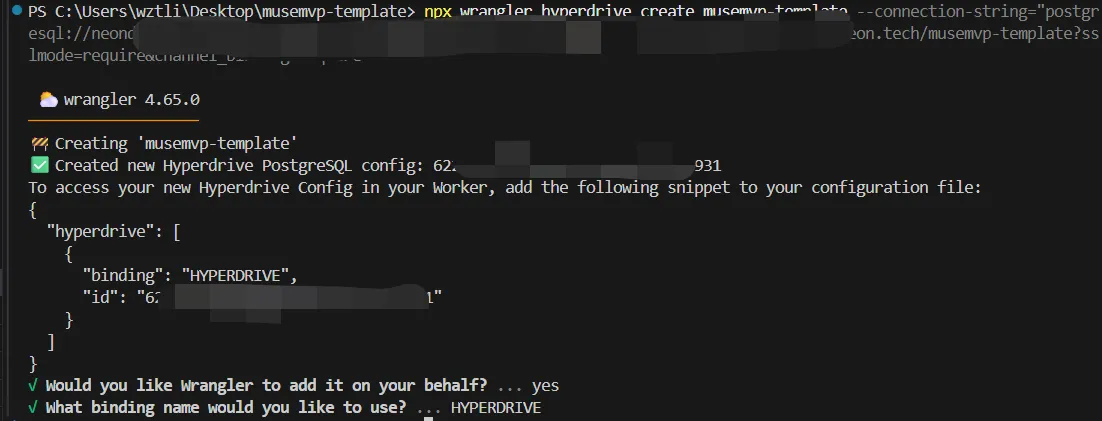
Create a Hyperdrive connection pool using the command below (replace the connection string with your actual database credentials):
npx wrangler hyperdrive create musemvp-demo --connection-string="postgresql://neondb_username:npg_password@ep-xxx-bush-xxxx-pooler.ap-xxx-1.xxx.neon.tech/demo-musemvp-com?sslmode=require&channel_binding=require"Upon success, it should look like this:
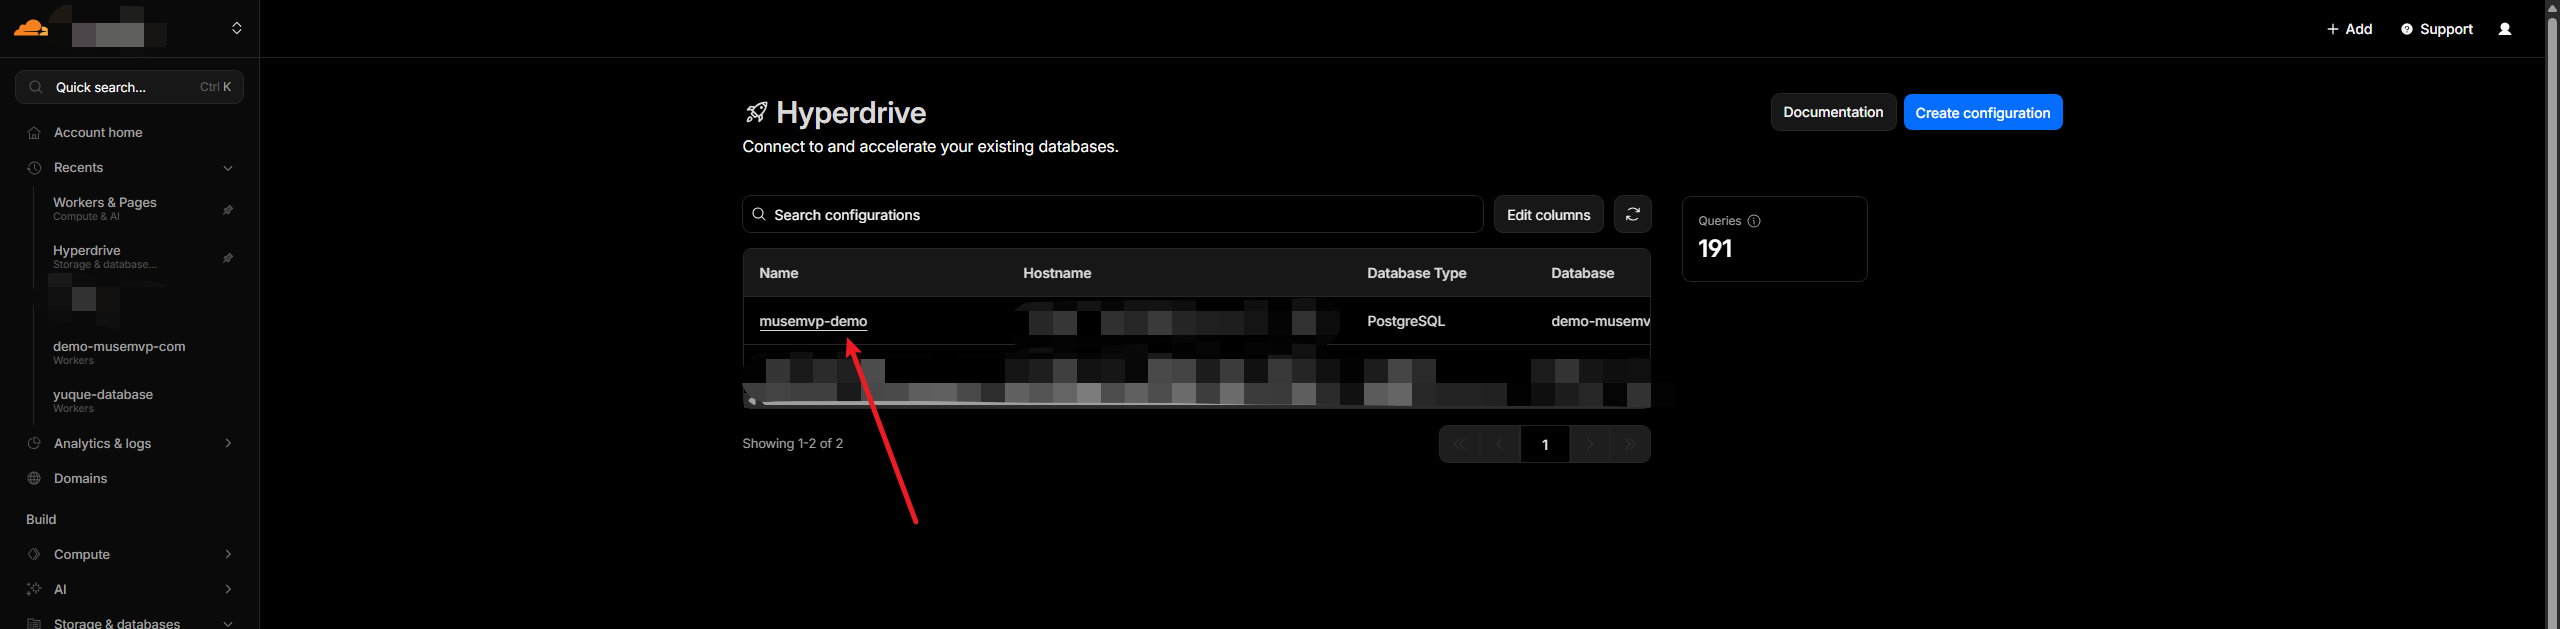
You can verify the Hyperdrive resource exists in the Cloudflare dashboard:
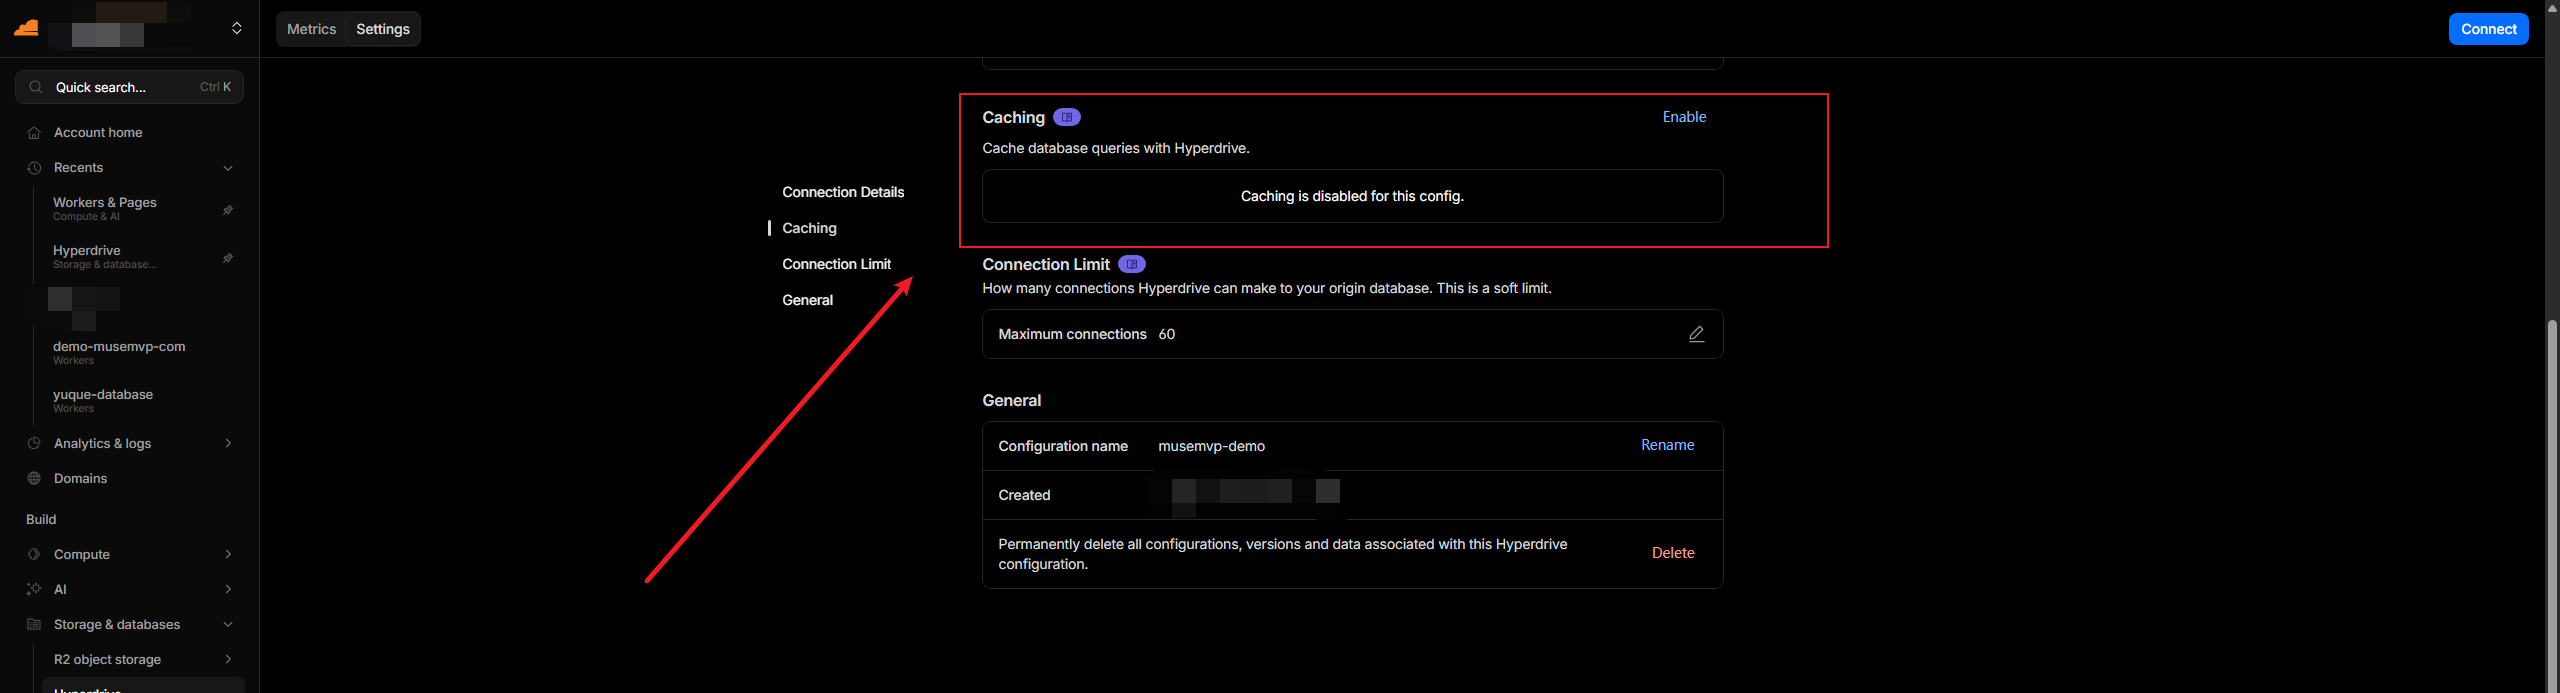
Disable Hyperdrive query caching
Edit the newly created Hyperdrive resource in the dashboard and disable query caching.
Leaving caching enabled can cause unexpected data staleness and other hard-to-trace issues.
After creation, the terminal will automatically populate wrangler.jsonc with the returned resource ID:
{
  "hyperdrive": [
    {
      "binding": "HYPERDRIVE",
      "id": "<YOUR_HYPERDRIVE_ID>",
      "localConnectionString": "postgresql://postgres:postgres@localhost:5432/postgres"
    }
  ]
}
Note
The localConnectionString must point to your local development database. If you don't have one, the template string above is acceptable — omitting it entirely will cause a build error in Cloudflare Worker.
Generate TypeScript Types
Run the following command to generate TypeScript types based on your current Cloudflare bindings configuration:
pnpm run cf-typegenCreate the Worker Project
You can also create the Worker project directly from the Cloudflare dashboard:
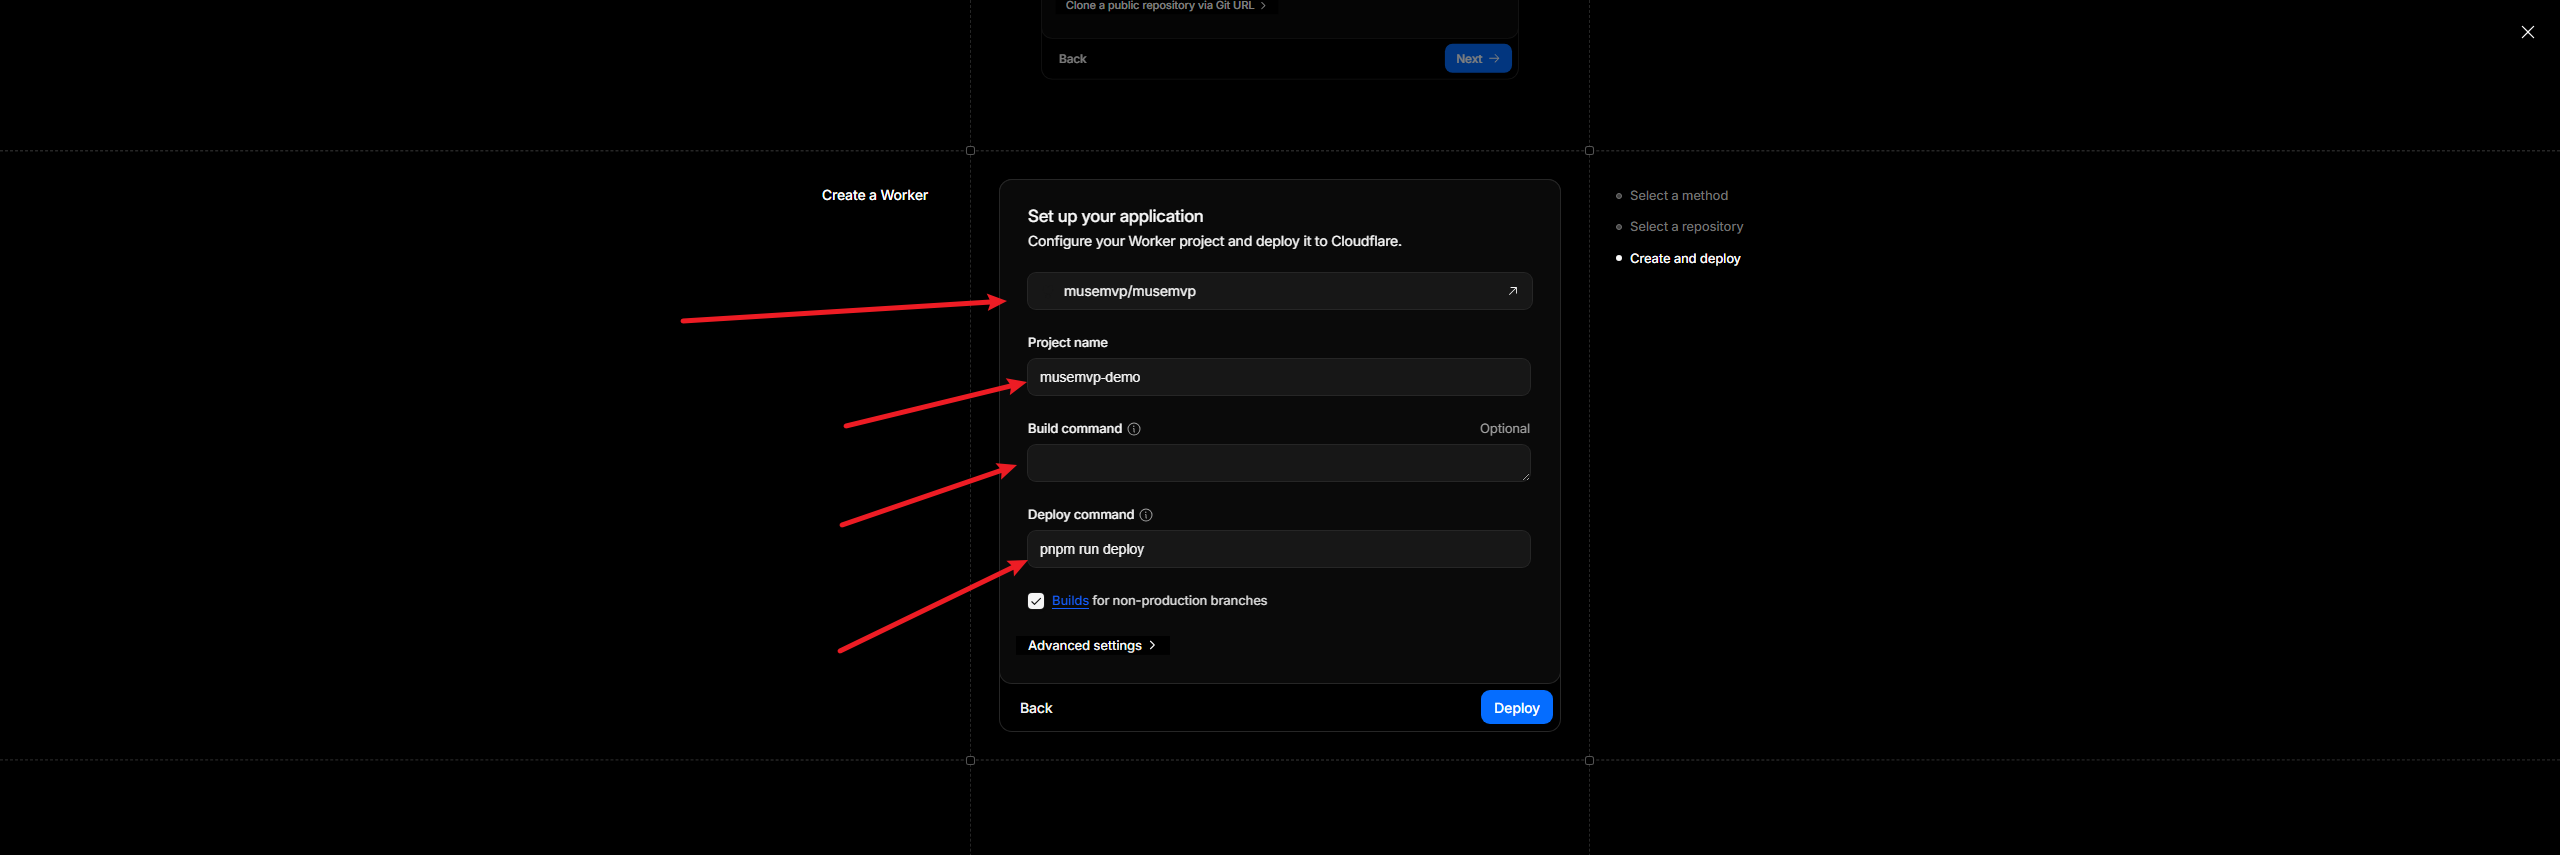
Quick reference
- Connect your GitHub repository
- Project name: your Worker name
- Build command: leave blank
- Deploy command:
pnpm run deploy
Before deploying, apply the latest database migrations to your remote instance:
pnpm install
pnpm drizzle:migrate
Then run the initial deployment:
pnpm run deployFirst deployment will fail
This script automatically creates and deploys your Worker project on Cloudflare. The first deployment will fail — don't worry, this is expected since environment variables haven't been configured yet.
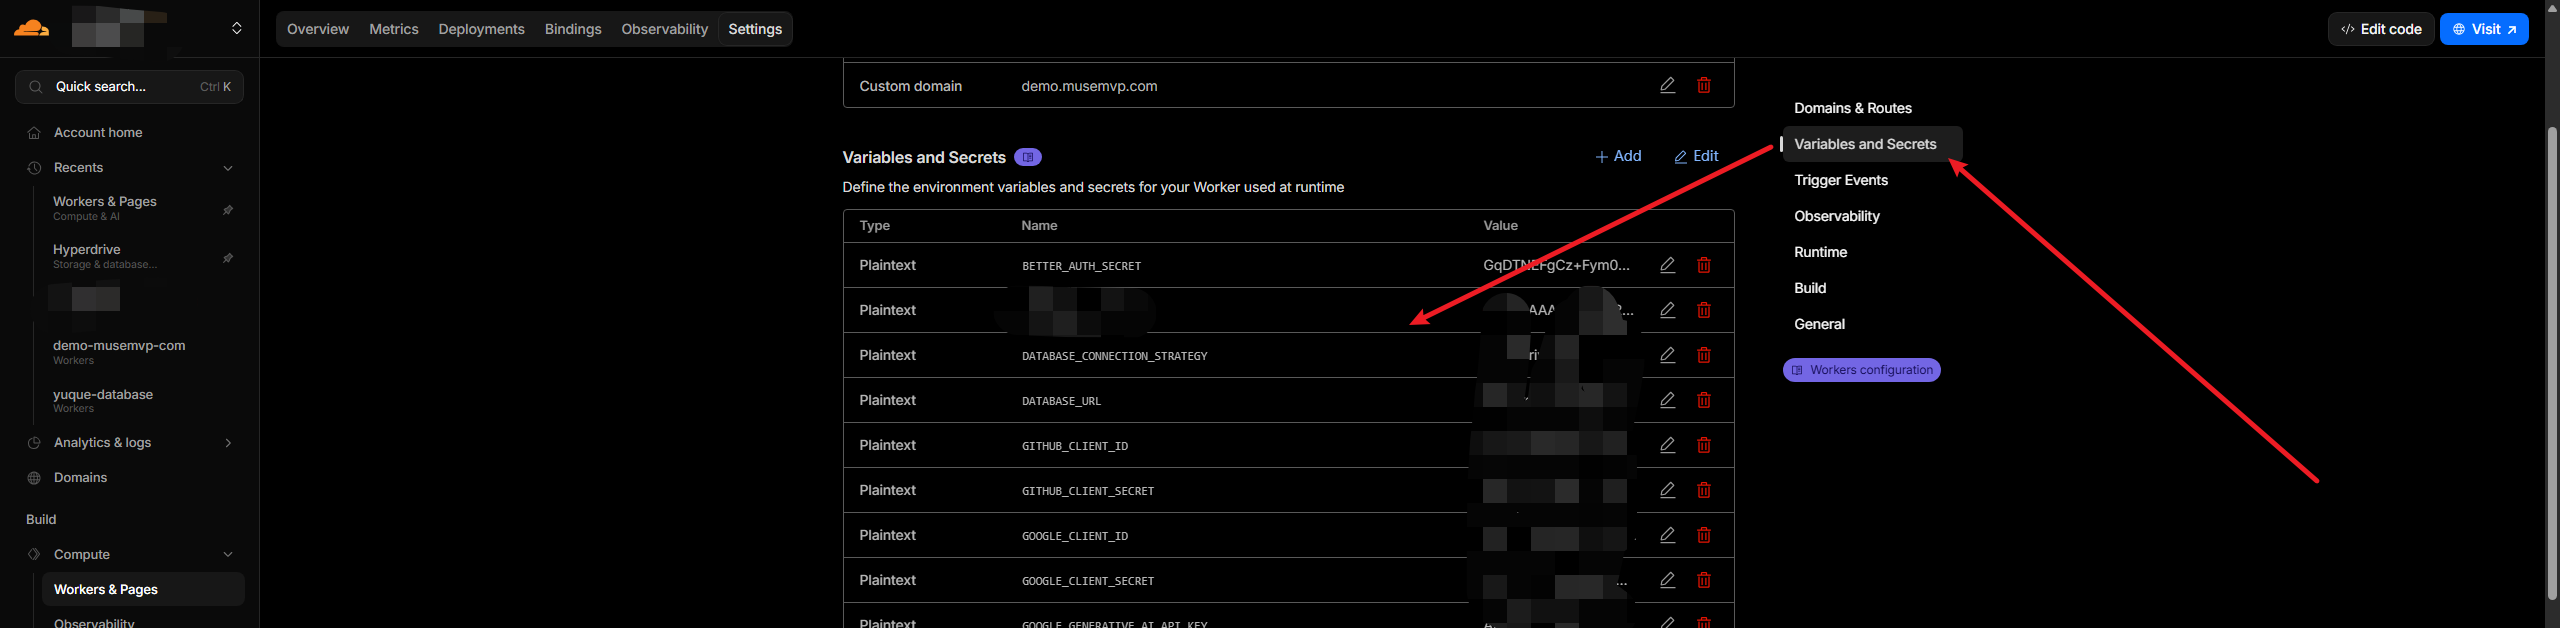
Configure Environment Variables
Go to your Worker project settings in the Cloudflare dashboard and configure environment variables.
The following are runtime environment variables — it's recommended to configure all of them:
Inject runtime variables via CLI
You can also bulk-inject environment variables locally in encrypted form using:
# Local development variables
wrangler secret bulk .env
# Production variables
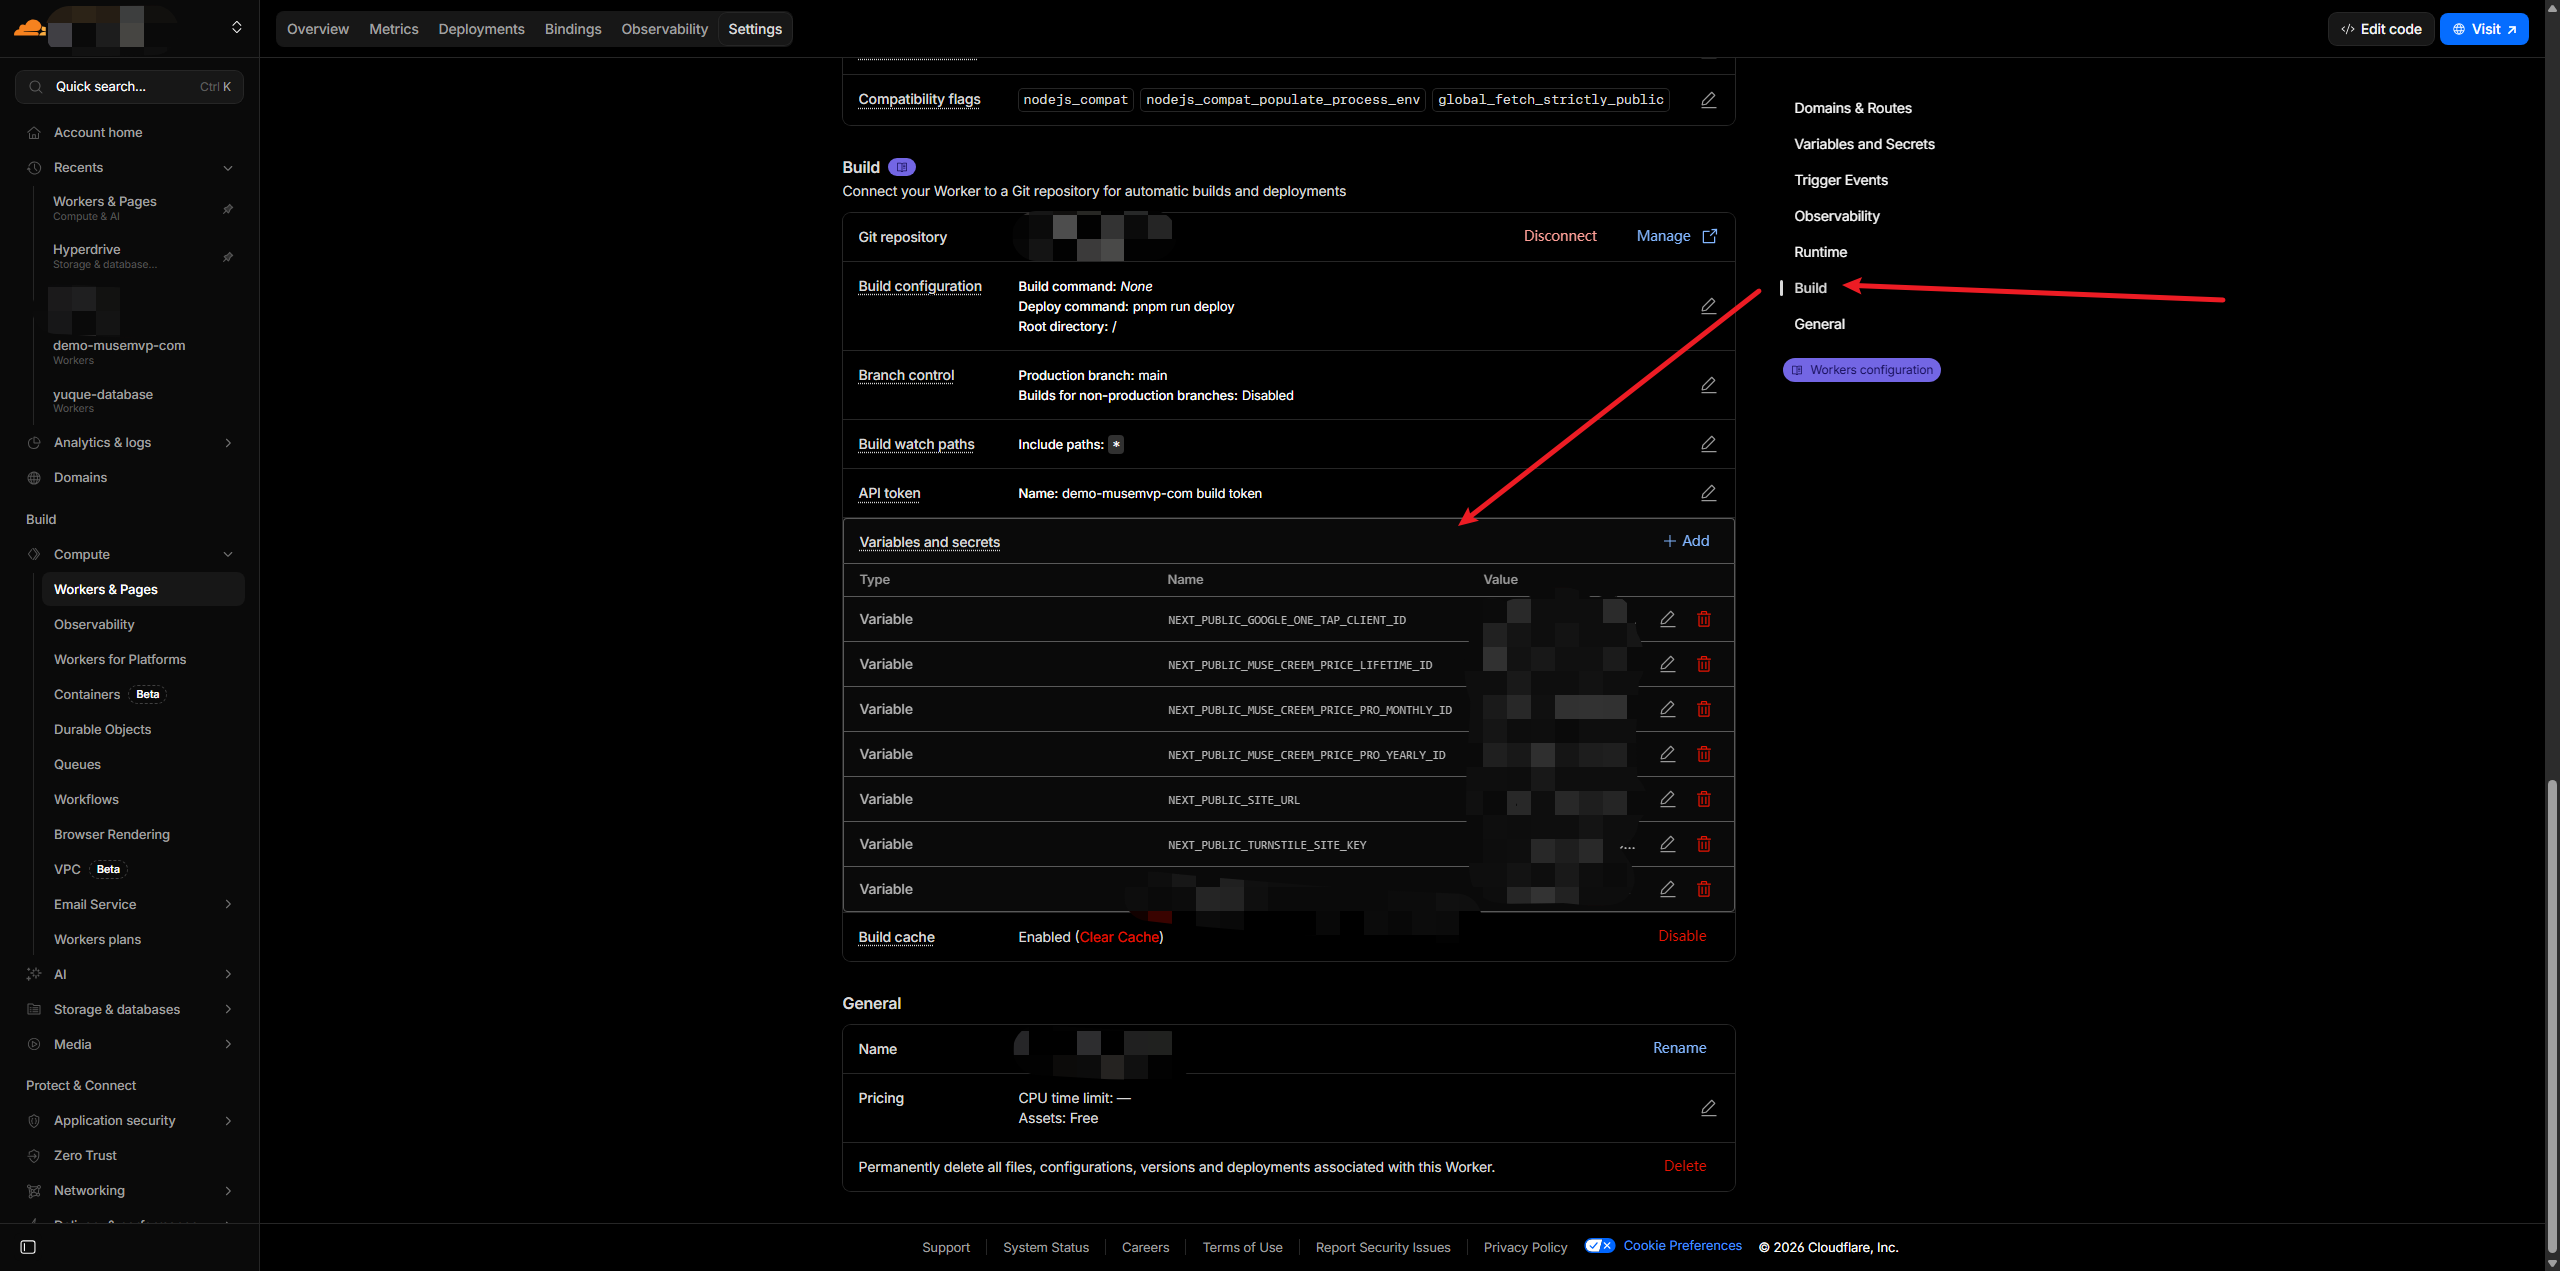
wrangler secret bulk .env.productionThe following are the environment variables required during build time. Simply configure the environment variables that start with NEXT_PUBLIC:
Bind a Custom Domain
In the Cloudflare Worker project settings, add and bind your custom domain:
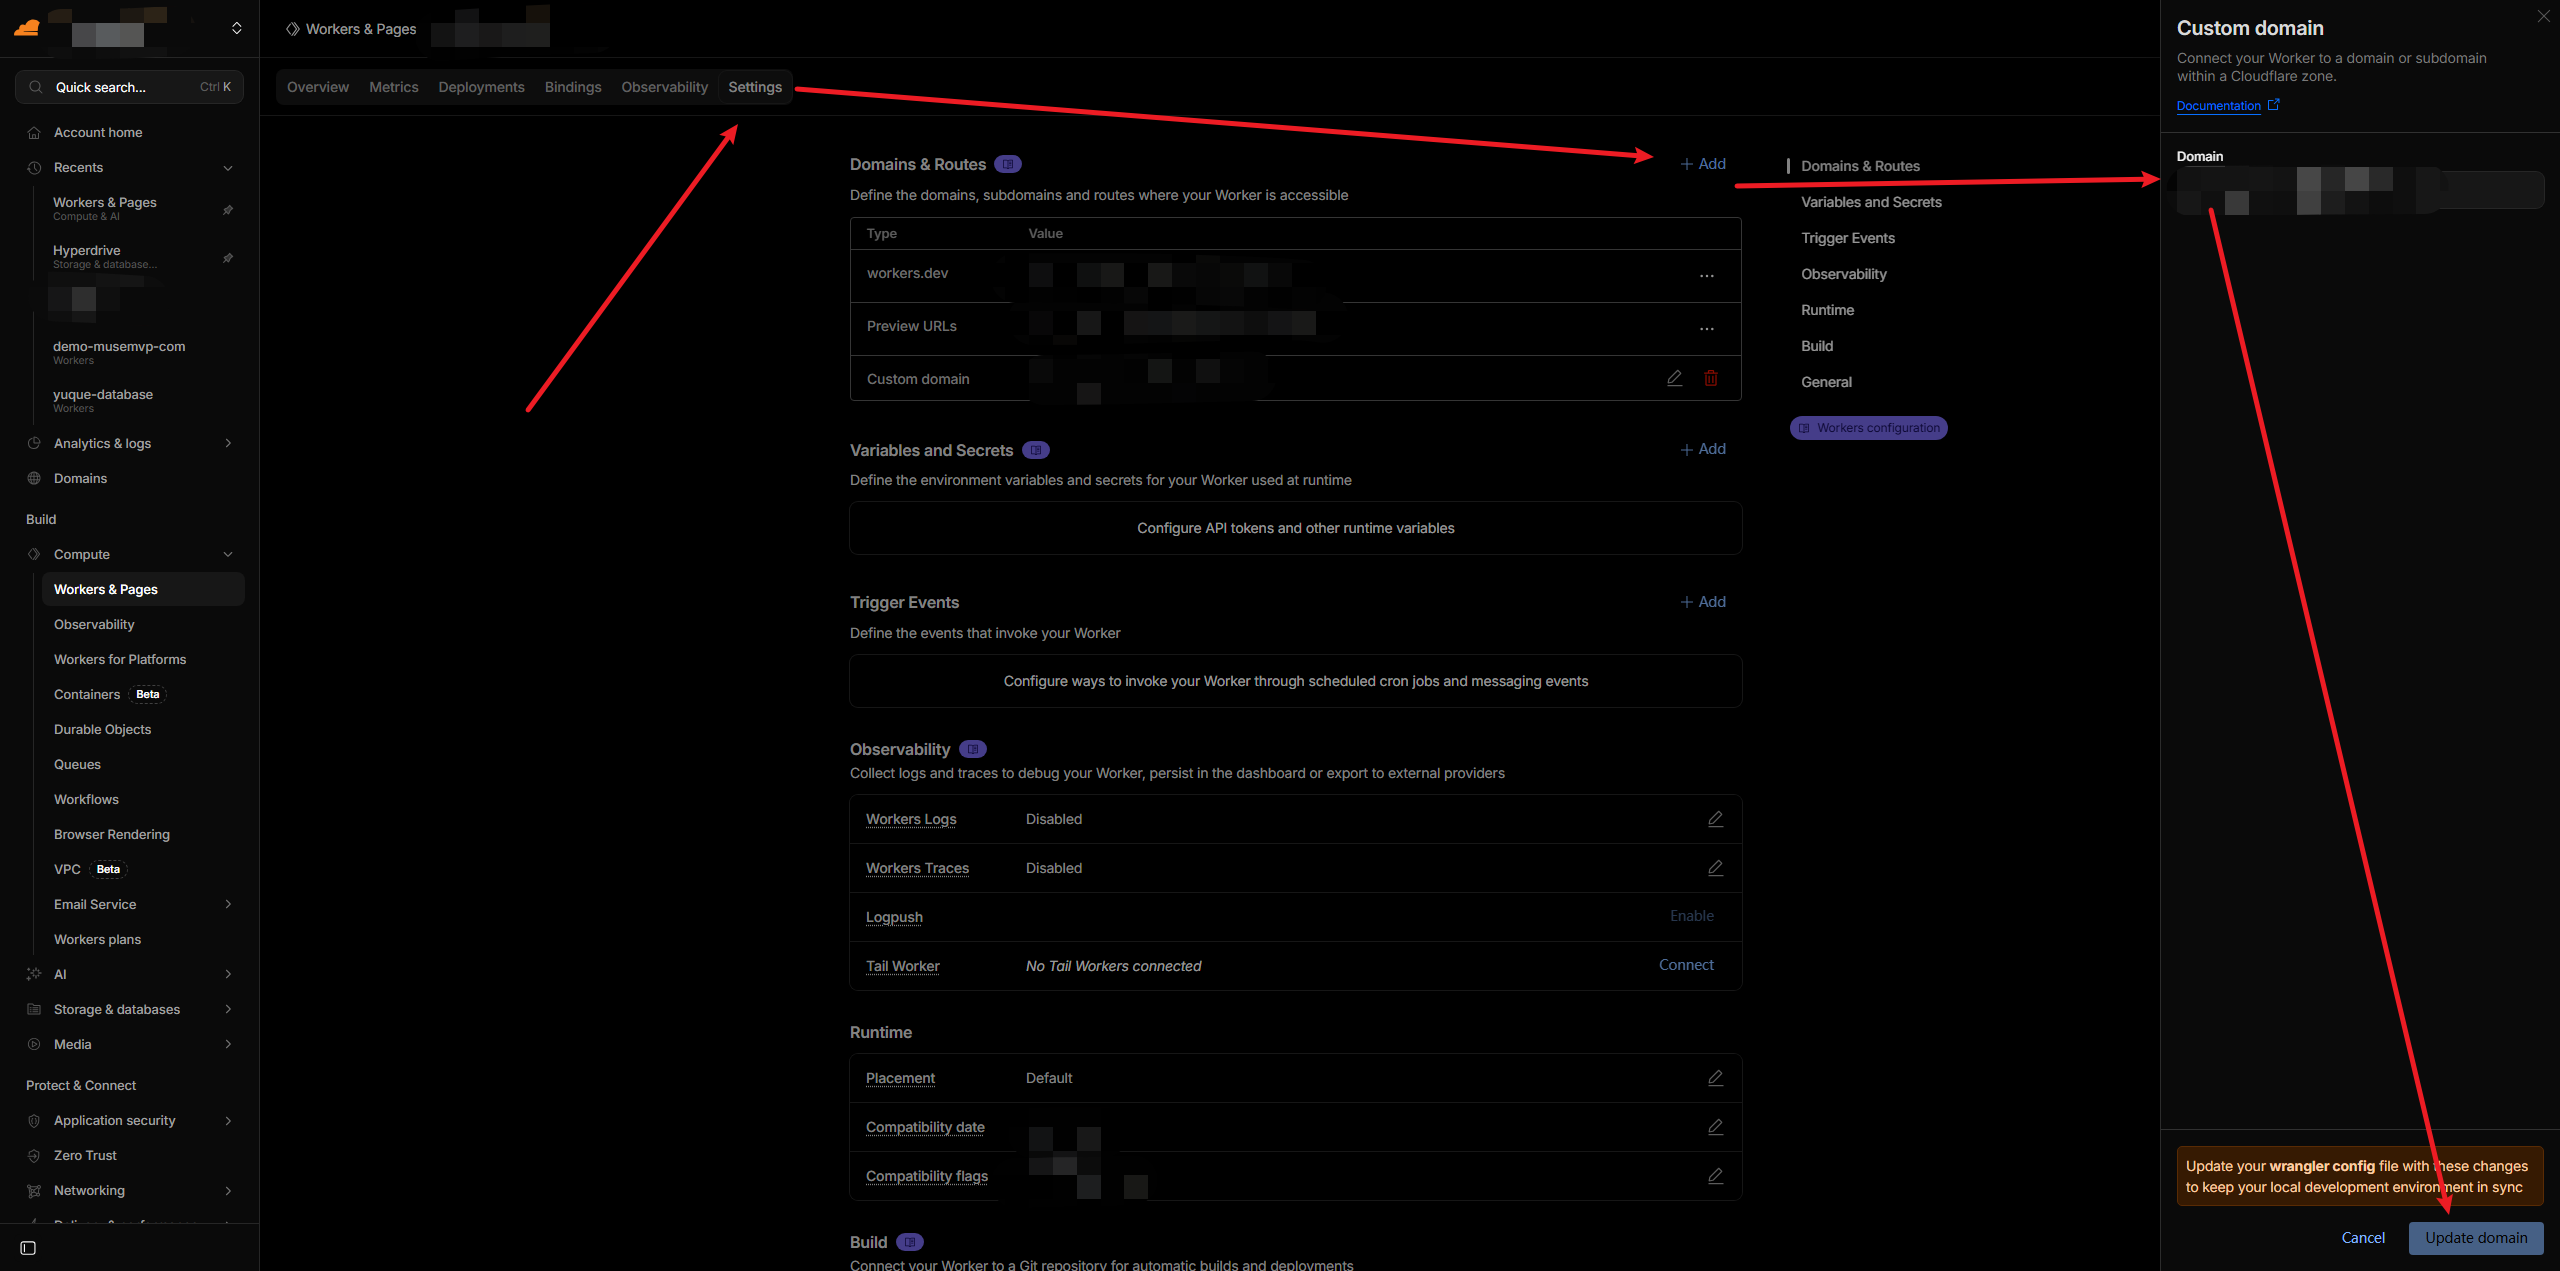
Once environment variables are configured and the domain is bound, re-run pnpm deploy to redeploy.
That's it! Your app is now successfully deployed to Cloudflare Workers, congratulations! 🎉
Troubleshooting
Most errors stem from misconfigured bindings or missing secrets — check those first. If you encounter issues during deployment or runtime, try the following:
Log shows source=database_url
This means a fallback occurred. Check wrangler.jsonc and ensure the binding name is exactly HYPERDRIVE (case-sensitive).
Third-party OAuth redirect mismatch
Make sure NEXT_PUBLIC_SITE_URL exactly matches the actual domain your Worker is resolving to.
If problems persist after trying these steps, review your Cloudflare Worker logs for more detailed error information.